| Brief
Description: |
After installing
Debian GNU/Linux 3.0, the system fails to correctly recognize the
SCSI Interface, kernel panics and system halts. |
| Problem
Description: |
Debian
GNU/Linux for Alpha incorrectly identifying the SCSI controller
on an Digital (Compaq/HP) AlphaServer 4100. The
error is as follows:
SCSI subsystem driver Revision: 1.00
sym53c8xx: at PCI bus 1, device 1, function 0
sym53c8xx: not initializing, device not supported
sym53c8xx: at PCI bus 1, device 3, function 0
sym53c8xx: not initializing, device not supported
/lib/modules/2.4.27-1-generic/kernel/drivers/scsi/sym53c8cc.o:
init_module: No such device
Hint: insmod errors can be caused by incorrect module parameters,
including invalid IO or IRQ parameters.
.................[Deleted]
Kernel panic: Attempted to kill init!
In spending the best part of the last 2 days researching this
error, I have found that it is a common problem with the sym53c8xx
driver. I have verified the card is working as I can boot Tru64
with it - everything works perfectly under Tru64.
|
| Refer: |
http://forums.debian.net/viewtopic.php?t=489 Submitted by Rick
Ruggiero
(29-Dec-2004) |
|
Instructions / Workaround |
|
Step |
Description |
Command |
|
1 |
Depress the system HALT key and then startup the system |
Depress system HALT key |
|
2 |
Insert the Debian GNU/Linux CD (CD #1 from distribution) and
boot from the CD-ROM |
P00>>> boot dka500 <Enter> |
|
3 |
Boot from the default kernel image and parameters at the "aboot"
prompt. |
aboot> 0 <Enter> |
|
4 |
Allow the installation to commence by selecting the
appropriate language and keyboard type |
- |
|
5 |
Configure your drive partitions. Below is how I set up
my RZ29B (4.3GB SCSI Drive) hard drive:
part1: type = aboot partition, size = 1MB
part2: type = ext2 partition, size = 80MB
part3: type = ext3 partition, size = 3.2GB
part4: type = swap, size = 1GB
Finish and write the partition configuration to the disk |
- |
|
6 |
The installation will now commence and start installing the
base system from the CD. This should hopefully go to
completion without problems.
If you are prompted to select a
kernel, select 2.6.8-alpha-generic kernel |
- |
|
7 |
Once Debian
has finished installing the base system you will be asked to remove
the CD and reboot the system. Just leave it there as you WILL
need it again. |
- |
|
8 |
Reboot the system, once you see the video card bios
displayed on the screen depress the system HALT key again.
This is necessary to prevent it booting up from the last
known boot device. |
Depress system HALT key |
|
9 |
Boot from the hard drive to load the "aboot" console. |
P00>>> boot dkb0 <Enter> |
|
10 |
Boot from the hard drive to verify the installation status.
This is done by selecting the default kernel image and
parameters at the "aboot" prompt. |
aboot> 0 <Enter> |
|
11 |
After loading
the kernel from your image file on your hard drive you should end
up with the infamous sym53c8xx error and resulting kernel panic
on your screen. Reboot from the CD-ROM drive; redo step 1
to step 4. DO NOT REPARTITION YOUR HARD DRIVE! |
Redo step 1 to 4 |
Now the fun begins |
|
12 |
You must
allow the installation software has reach the point where the disk
partitioning begins. This is necessary to have the appropriate
kernel modules loaded and to have all of your devices recognized.
Once you are at this point go to the second console. |
<ALT F2> Simultaneously |
|
13 |
Nearly finished, prepare your system to receive the
appropriate kernel image. |
#
umount /cdrom <Enter>
#
mkdir /root <Enter>
#
mount /dev/scsi/host1/bus0/target0/lun0/part3
/root <Enter>
#
mkdir /root/boot <Enter>
#
mount /dev/scsi/host1/bus0/target0/lun0/part2
/root/boot <Enter>
#
mount /dev/cdroms/cdrom0 /root/cdrom
-r ro
#
chroot /root
#
mount -tproc none /proc |
|
14 |
Install modules-init-tools |
#
cd /cdrom/pool/main/m/modules-init-tools
<Enter>
#
dpkg -i * <Enter> |
|
15 |
Install the new kernel (requires modules-init-tools) |
#
cd
../../k/kernel-image-2.6.8-1-generic <Enter>
#
dpkg -i
kernel-image-2.6.8-1-generic <Enter> |
|
16 |
Set up the boot options for the "aboot" console |
# cd /boot/etc <Enter> |
|
17 |
Add
the following line for your new kernel by substituting one of
the lines in the existing file; in this example I selected boot
option 2 (3rd line). When the system boots to the "aboot"
console I would need to type: "2 <Enter>" to boot
my new kernel. My file contains the following:
2:2/vmlinuz-2.6.8-1-generic ro
initrd=/initrd.img-2.6.8-1-generic root=/dev/sda3 |
# vi aboot.conf <Enter> |
|
18 |
Add
the following line in to /etc/init.d/rcS as the second line of
the script (after #!/bin/sh)
/bin/dmesg -n4
Top of my /etc/init.d/rcS:
#! /bin/sh
#
# rcS Call all S??* scripts in /etc/rcS.d in
# numerical/alphabetical order.
#
# Version: @(#)/etc/init.d/rcS 2.76 19-Apr-1999 miquels@cistron.nl
#
PATH=/sbin:/bin:/usr/sbin:/usr/bin
runlevel=S
prevlevel=N
umask 022
export PATH runlevel prevlevel
# Need to stop the confounded
error messages on this system so I will
# reset the console message level until I can fix the driver for
the
# SCSI interface
#
# RR - 31-Dec-2004
echo -n "Resetting console message level to 4: "
/bin/dmesg -n4
echo Done.
----[Rest of the file is as provided by Debian]----
|
#
vi /etc/init.d/rcS <Enter> |
|
19 |
Reboot
your system from the hard drive and the installation will continue
as normal on the new, working base installed system. |
- |
|
FINISHED AND CONGRATULATIONS ON YOUR NEW
BABY! |
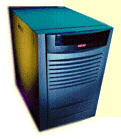
 Installing
Debian GNU/Linux 3.0 on a Digital AlphaServer 4100 (AS4100)